
# Acurite Weather Station Mounting Guide: Tips and Techniques for Optimal Installation
Installing an Acurite weather station correctly is crucial for obtaining accurate and reliable weather data. Whether you’re a weather enthusiast or simply want to monitor local conditions, proper mounting ensures your device performs at its best. This guide will walk you through the essential tips and techniques for mounting your Acurite weather station effectively.
## Choosing the Right Location
The first step in mounting your Acurite weather station is selecting the ideal location. The placement of your weather station can significantly impact the accuracy of its readings. Here are some key considerations:
– **Avoid Obstructions:** Ensure the station is placed away from buildings, trees, or other structures that could block wind or sunlight.
– **Elevation:** Mount the station at a height of 5-7 feet above the ground to avoid ground-level interference.
– **Sun Exposure:** Position the station where it can receive direct sunlight for accurate temperature readings, but avoid placing it in areas prone to overheating.
## Mounting Options for Your Acurite Weather Station
Acurite weather stations come with various mounting options to suit different environments. Below are the most common methods:
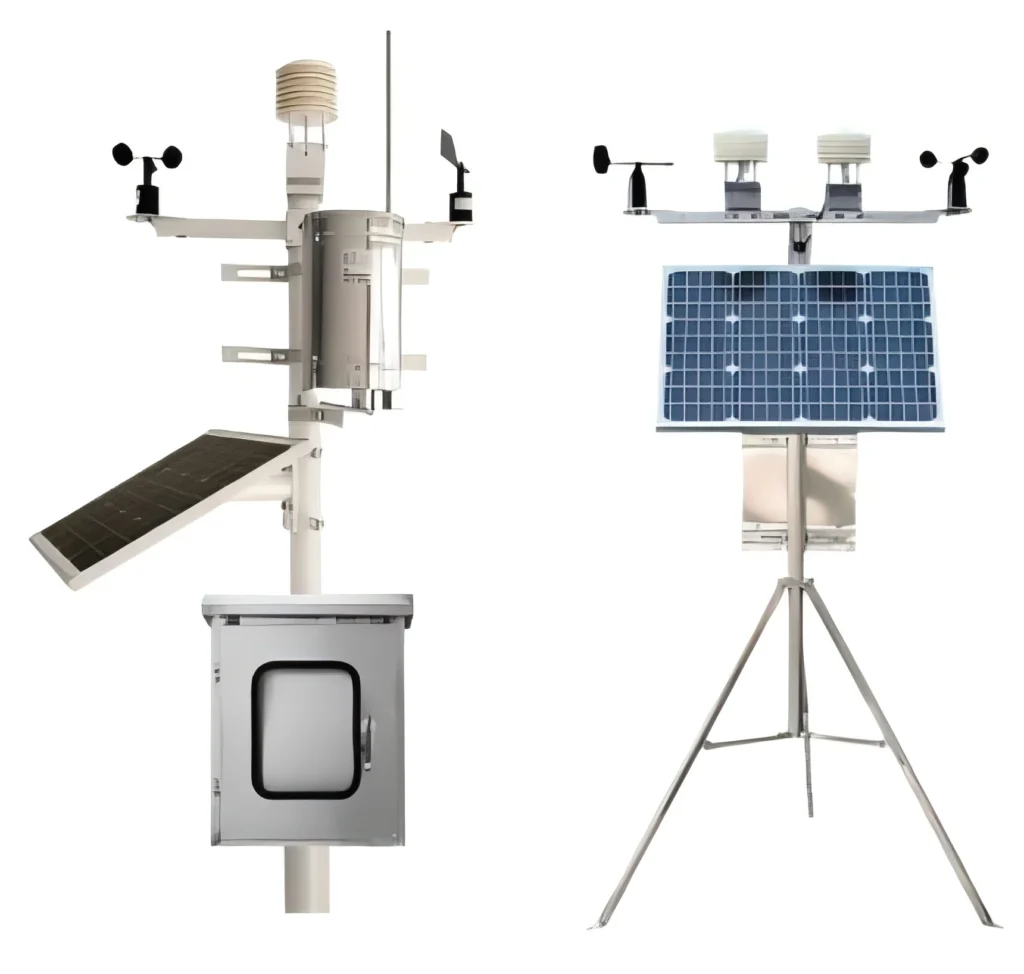
### 1. Pole Mounting
Pole mounting is a popular choice for many users. It allows you to position the weather station at an optimal height and location. Follow these steps for a secure pole mount:
– Choose a sturdy pole made of metal or durable plastic.
– Use the provided mounting bracket to attach the station to the pole.
– Ensure the pole is securely anchored to the ground or a stable surface to prevent movement during strong winds.
### 2. Wall Mounting
If pole mounting isn’t feasible, wall mounting is another excellent option. This method is ideal for placing the station on the side of a building or fence. Here’s how to do it:
– Select a flat, vertical surface that meets the location requirements mentioned earlier.
– Use screws or bolts to attach the mounting bracket to the wall.
– Secure the weather station to the bracket, ensuring it is level and stable.
### 3. Tripod Mounting
For temporary or portable setups, a tripod mount can be a great solution. This method is particularly useful for those who need to move their weather station frequently. To set up a tripod mount:
– Assemble the tripod and ensure it is stable on the ground.
– Attach the weather station to the tripod using the provided mounting hardware.
– Adjust the height and angle of the tripod to achieve the desired positioning.
## Tips for Ensuring Accurate Readings
Once your Acurite weather station is mounted, follow these additional tips to maintain its accuracy:
– **Regular Maintenance:** Clean the sensors and check for debris or obstructions periodically.
– **Calibration:** Calibrate the station as needed to ensure precise measurements.
– **Battery Check:** Replace batteries regularly to avoid interruptions in data collection.
## Conclusion
Properly mounting your Acurite weather station is essential for accurate and reliable weather monitoring. By choosing the right location, selecting the appropriate mounting method, and following maintenance tips, you can ensure your station performs optimally. Whether you’re tracking temperature, humidity, or wind speed, a well-installed weather station will provide the data you need to stay informed about your local weather conditions.
Keyword: acurite weather station mounting
Leave A Comment